Craft Room Organization Part I
 |
| *This post uses affiliate links. Click the link in the sidebar for more information. |
 |
| This is how I "file" my assortment of journal cards by kit or color. |
The centerpiece of my entire organization system are these storage boxes.
These boxes fit perfectly on top of my Raskog. I used to use this little cart before I got my Raskog and, though it was a bit smaller, it still held everything I needed. And it has wheels which were awesome when I was moving my workspace around before I "built" my craft area. Since I got my Raskog, this cart was repurposed to hold cleaning supplies in our utility closet.
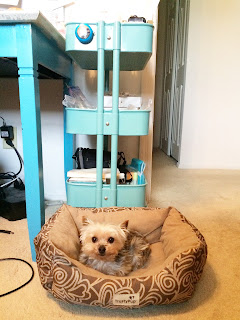
On the top shelf of my Raskog are my journal cards, a mug with pens, rules, scissors, and a hole punch, a package of baby wipes for my stamps, and all of my stamps, blocks, and ink pads organized upright in a clear divided acrylic organizer.
There is also a ziploc baggie with my miscellaneous scraps. This comes in handy when I need one pop of color or just to add a little something to a page.
I also keep my 4x6 pads here for easy access. I have a separate bin with my 6x6 pads and these could go in there but they're new and I like looking at them!
The second shelf of my Raskog are my embellishments and some more stamping and painting supplies.
The third shelf of my Raskog is my "hoarder shelf." On it, I keep things some people would throw away, like the bags or boxes my kits come in and random packaging. Sometimes I like to incororate the fabric from the bags in my layouts or use something to store more stuff, if I need it. So I keep it mostly out of sight.
Having this little cart system really helps me stay organized, whether it be the kitchen cart of a Raskog. In a small space, it helps a lot to build vertically rather than spread out horizontally.
I hope this helps some of you with storage dilemmas and I have to say it's working well for me so far! Thanks for reading!


Your puppy is adorable. cute cart set up.
ReplyDeleteI'm lusting after that Ikea cart.
ReplyDeleteGreat room and cute cute dog ;)
ReplyDeleteI may get two more dog beds and put them where I scrap.
ReplyDeleteoh I love your 3x4 and 4x6 card storage! Thats a great idea!
ReplyDeleteWhy do I think that your little scrapping buddy is less intrusive than my kitty scrapping buddies?
ReplyDeleteAnd now I feel the need to go organize.
love it, thank you for posting this...and the pup, so cute!
ReplyDelete